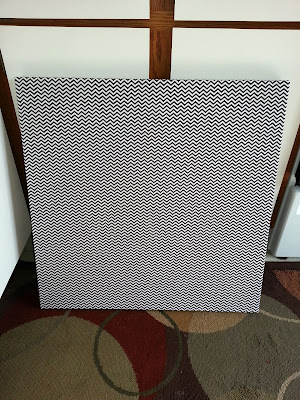
Besides that black and white chevron fabric, which I purchased on sale at JoAnn Fabrics for $4.99/yard, all the other materials used in this piece were recycled or upcycled. Obviously the canvas was an old painting I had, the frame was from an old picture I bought at the thrift store for $6.99 and I have a large collection of corks laying around the house. (No, I didn't drink ALL of those bottles of wine… just most of them!)
 |
| {Left: My old painting • Right: Old picture from thrift store} |
There can be many variations of this artwork per your own preferences, so go ahead and tweak for your liking! Here are the supplies you will need:
• Canvas or scrap wood (size of your choice)
• 1 yard of fabric
• Wood frame (with glass, picture and backing removed)
• Sand paper
• Wine corks (Number of corks will vary depending on the letter you are making)
• Hot glue gun
• Staple gun
• Black and Teal acrylic paint – or colors of your choosing (I also used white paint to cover up the old painting – optional)
• Acrylic Gloss coating spray (optional)
Now lets get started!!
Step One:
To start, I took the old wood frame and gave it a light sanding. You don't have to sand too much, just enough to get most of the shiny finish off of the frame. Next, give the frame two coats of acrylic paint. (you may need 3 depending on the thickness of your paint.) Once the paint is completely dry and you are happy with the covering of the paint, take the frame to a well-ventilated area and spray it with the gloss coating spray. (This part is optional, but I did it to give the frame a glossy finish, versus a more flat finish). This spray only takes about 20 minutes to dry completely.
Step Two (optional):
Give the old painting a coat or two of white paint, in order to make sure that none of the old painting shows through the fabric placed over it.
Step Three:
Iron your fabric to make sure that there are no fold lines visible. Then, place your canvas face down onto the fabric, and, starting on one side, pull the fabric nice and tight around the edge (starting in the middle of the edge) and staple the fabric to the wood frame of the canvas. Do this all along that edge, stapling about every 4 inches or so. Then, move on to the opposite side of the canvas and do the same thing, making sure to pull the fabric nice and tight. Once you have the fabric stapled along all four sides of the canvas, trim off any extra fabric, just so that it doesn't get in the way when you are hanging the artwork.
Step Four:
Lay your frame on the front of the canvas and determine the placement you would like. One you have figured out exactly where you would like the frame to sit, trace along the inside of the frame with a pencil so you have an idea of where to paint the black that will show behind the frame.
Take the black paint (or whatever color you choose) and paint inside the area that you just traced with the pencil. You will then actually paint a little outside the lines (I know, you were always taught to paint INSIDE the lines – but we are being rebels!) This will assure that you will not see any of the line once you attached the frame.
Step Five:
Once the paint in dry, we will attached the frame to the canvas. I did this as a two step process. First I used hot glue to get the frame on the canvas. The hot glue may have been enough to hold the frame since it was not very heavy, but I didn't want to take the chance of the frame falling off. So after the hot glue is dry, carefully flip the canvas with frame attached over so it is face down. Carefully use the staple gun (or small nails if you prefer) and staple into the frame from the back of the canvas. Staple along all edges of the frame. This will just give the frame a stronger hold to the canvas.
 |
| Detail showing the stapling on back of canvas |
Step Six:
You're almost done! Now it is time to create your cork letter. I spent a few minutes trying different ways to create my "K" with the corks. I played around with the corks on the artwork directly, so once I had them exactly how I wanted to them, I didn't have to try to move them or recreate it on the canvas. One by one I removed the corks and hot glued them back into place. Once all of the corks had been glued down, I went back and put hot glue in between all the corks as well to make sure they all stayed together nicely.
 |
| In this detail you can see the hot glue in between the corks |
AND… you're done!
Now go hang it up and BE PROUD of your new Frumpy to Funky creation!
Happy Earth Day!


No comments:
Post a Comment
Let me know what you think of my craftin'!